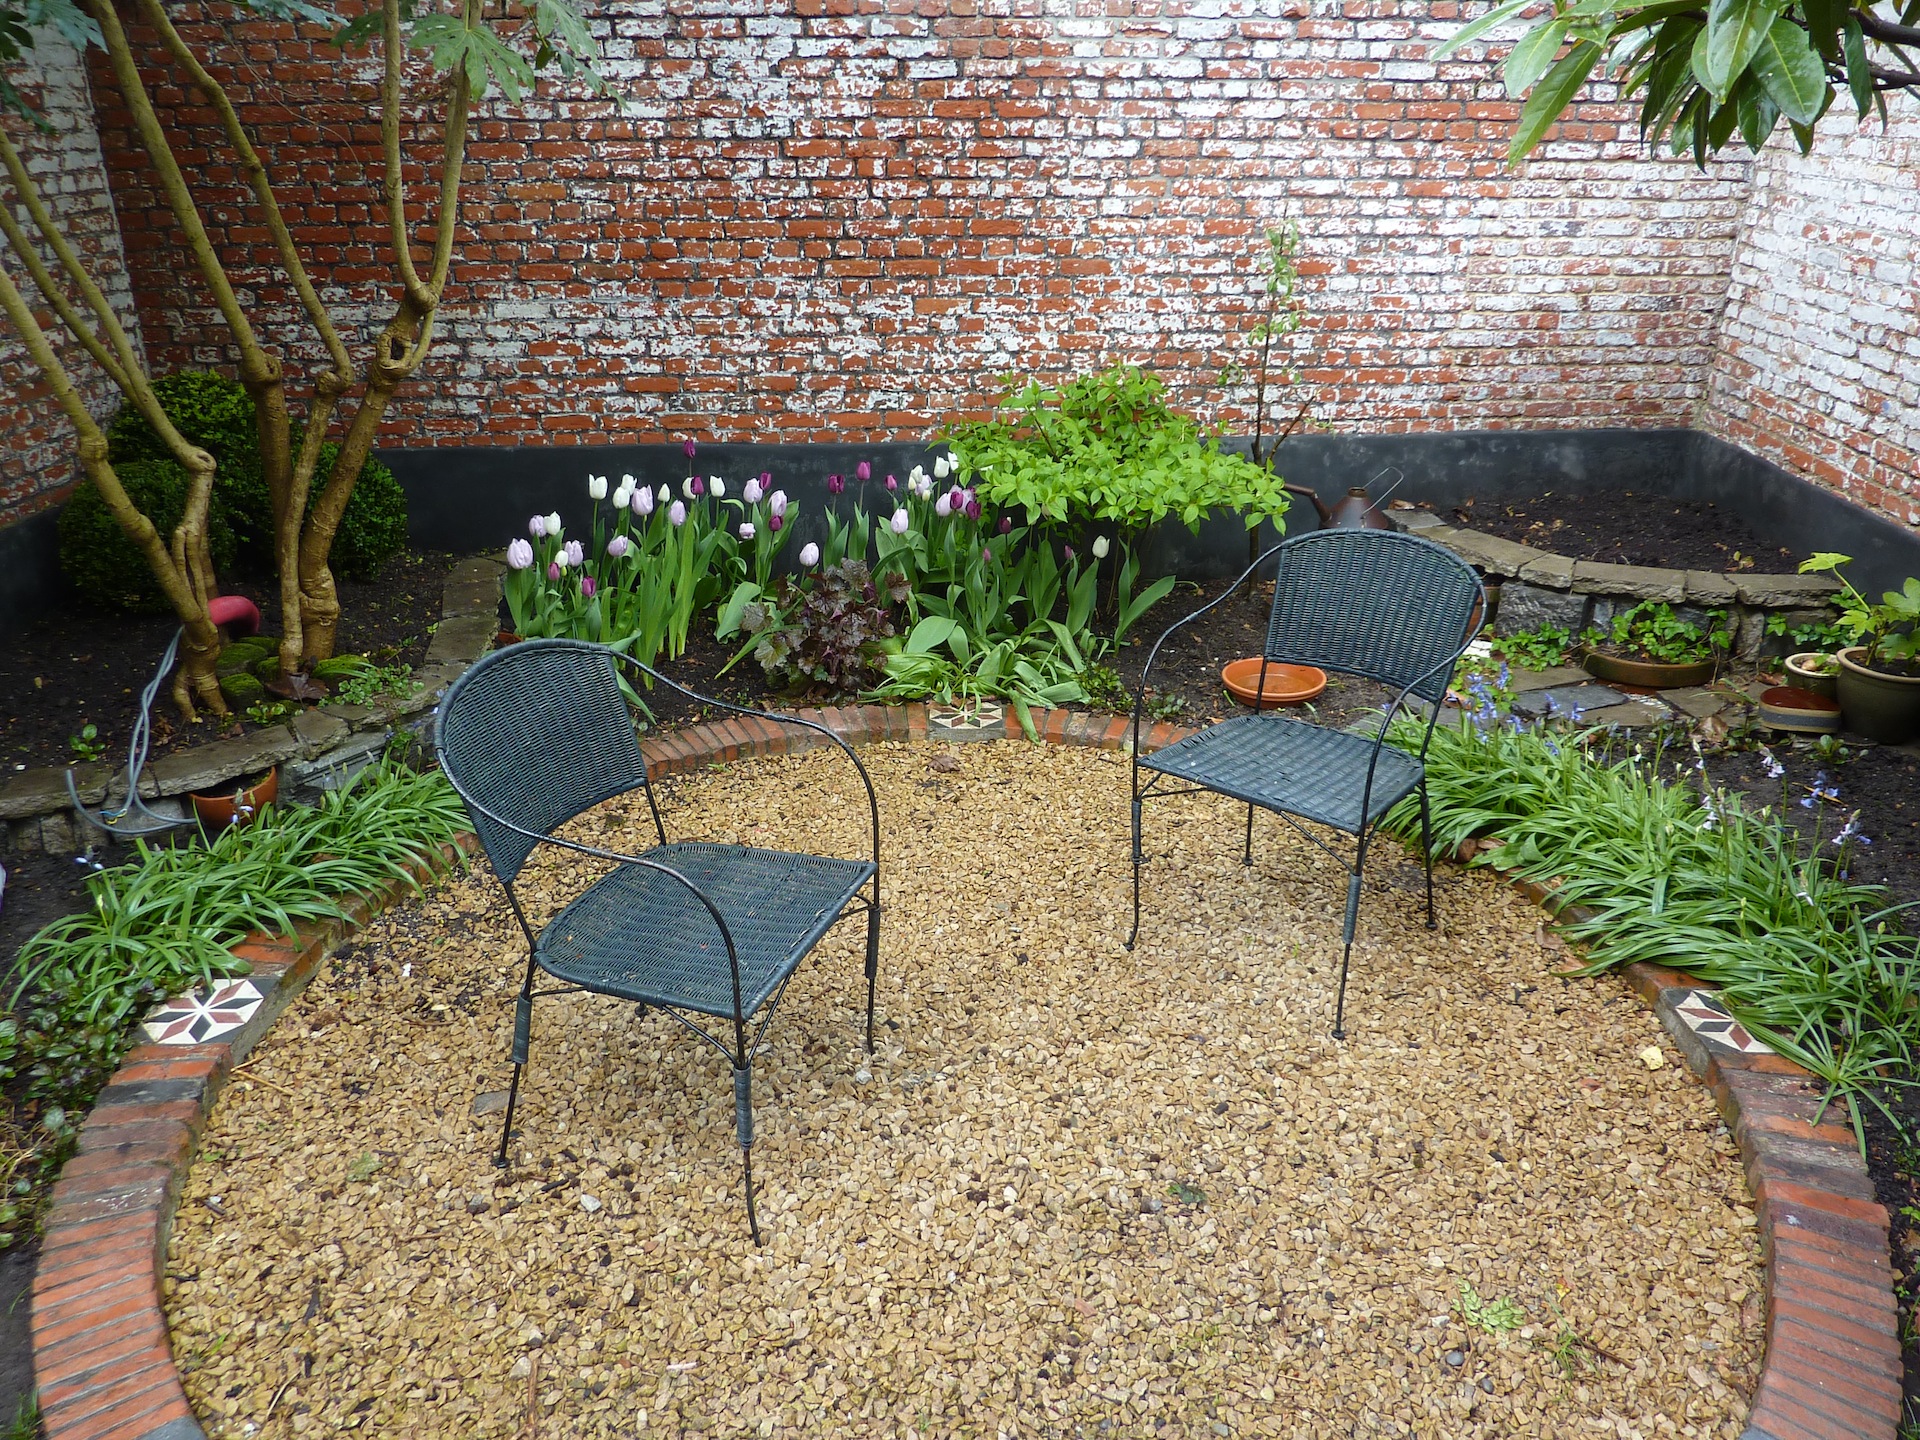
 When faced with the challenge of designing a garden space, a garden circle is a great solution. It’s dead easy to measure out, creates a strong focal point and looks very designed. It’s a great opportunity to introduce different textures into your garden by using materials like brick, stone, gravel and even decking. Making it a versatile hard-landscaping detail. When positioned along a wall or tucked into a corner It defines zones to use for planting beds. Garden circles work particularly well in small gardens – setting the stage for a dinning table, fire pit, or a couple of chase lounge.
Here’s how I made my garden circle using reclaimed brick and tiles.
First choose a location and the size of your circle. You can layout whatever furniture you plan to put in the circle to help determine the best size. I went with a three meter diameter and although it seemed huge when I was laying it out it really couldn’t have been any smaller and still accommodate my table and chairs.
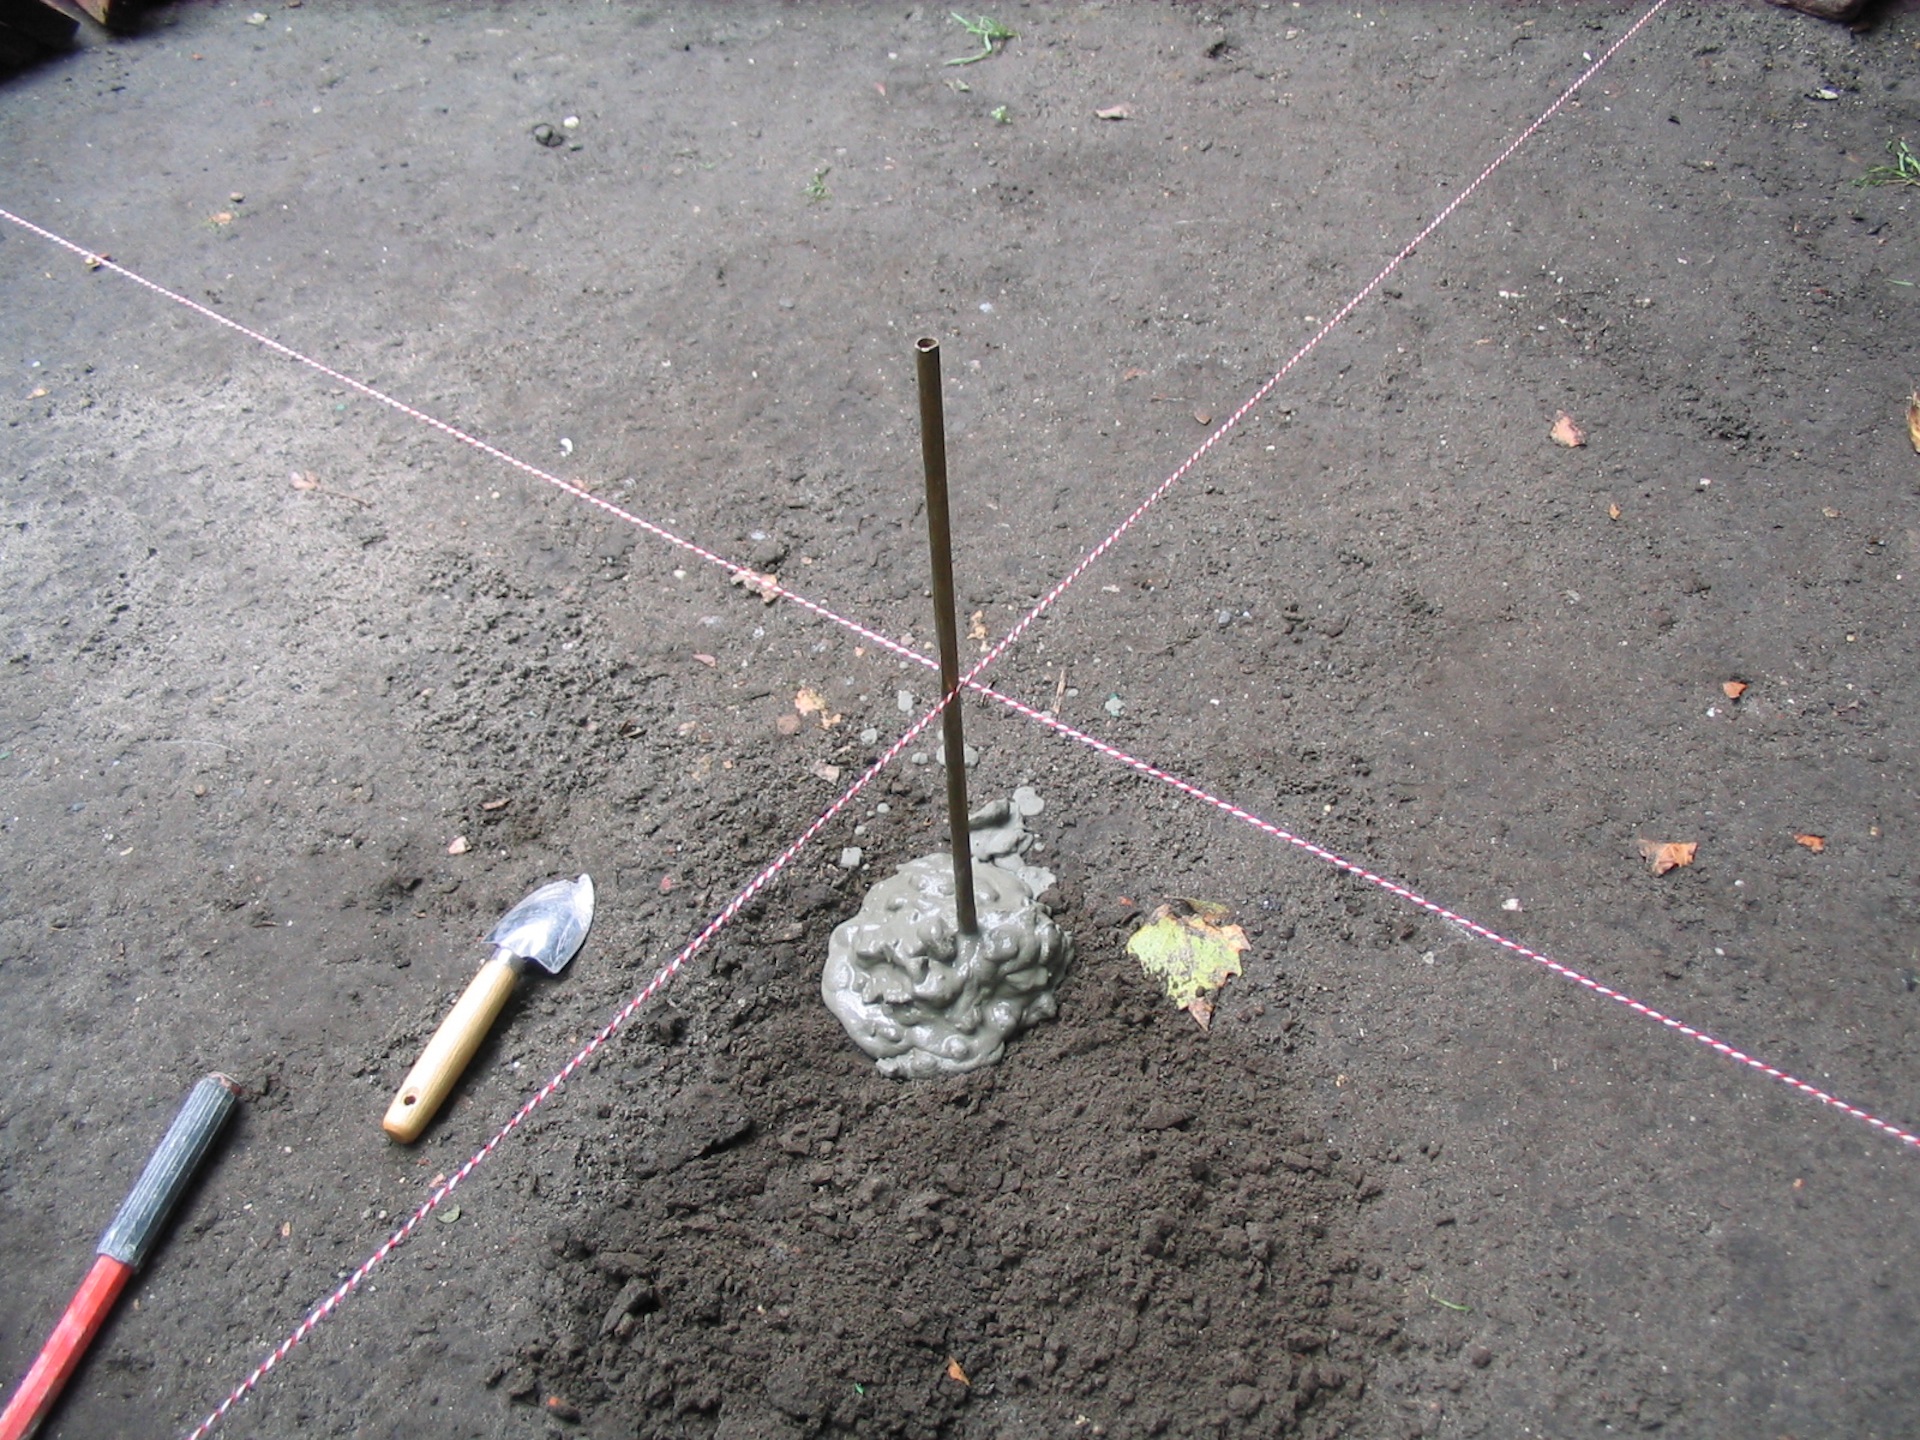 Once you have the radius figured out plant a stake in the ground where the center of the circle will be. Use a piece of rebar or pipe it has to be round. I had a piece of metal tube from an old lamp I used. I also used some quick drying cement to make a little foundation. I knew I would be relying on this stake to maintain the circumference so I wanted to make sure it didn’t wiggle around in the dirt.
 Now you need some strong string or cord. I used a length of small chain and a link from a decorative bit of lamp chain because I figured it would be getting wet and I didn’t want it to stretch or stick to the stake as I moved it around. I then used blue painters tape to mark the inner and outer circumference of the circle.
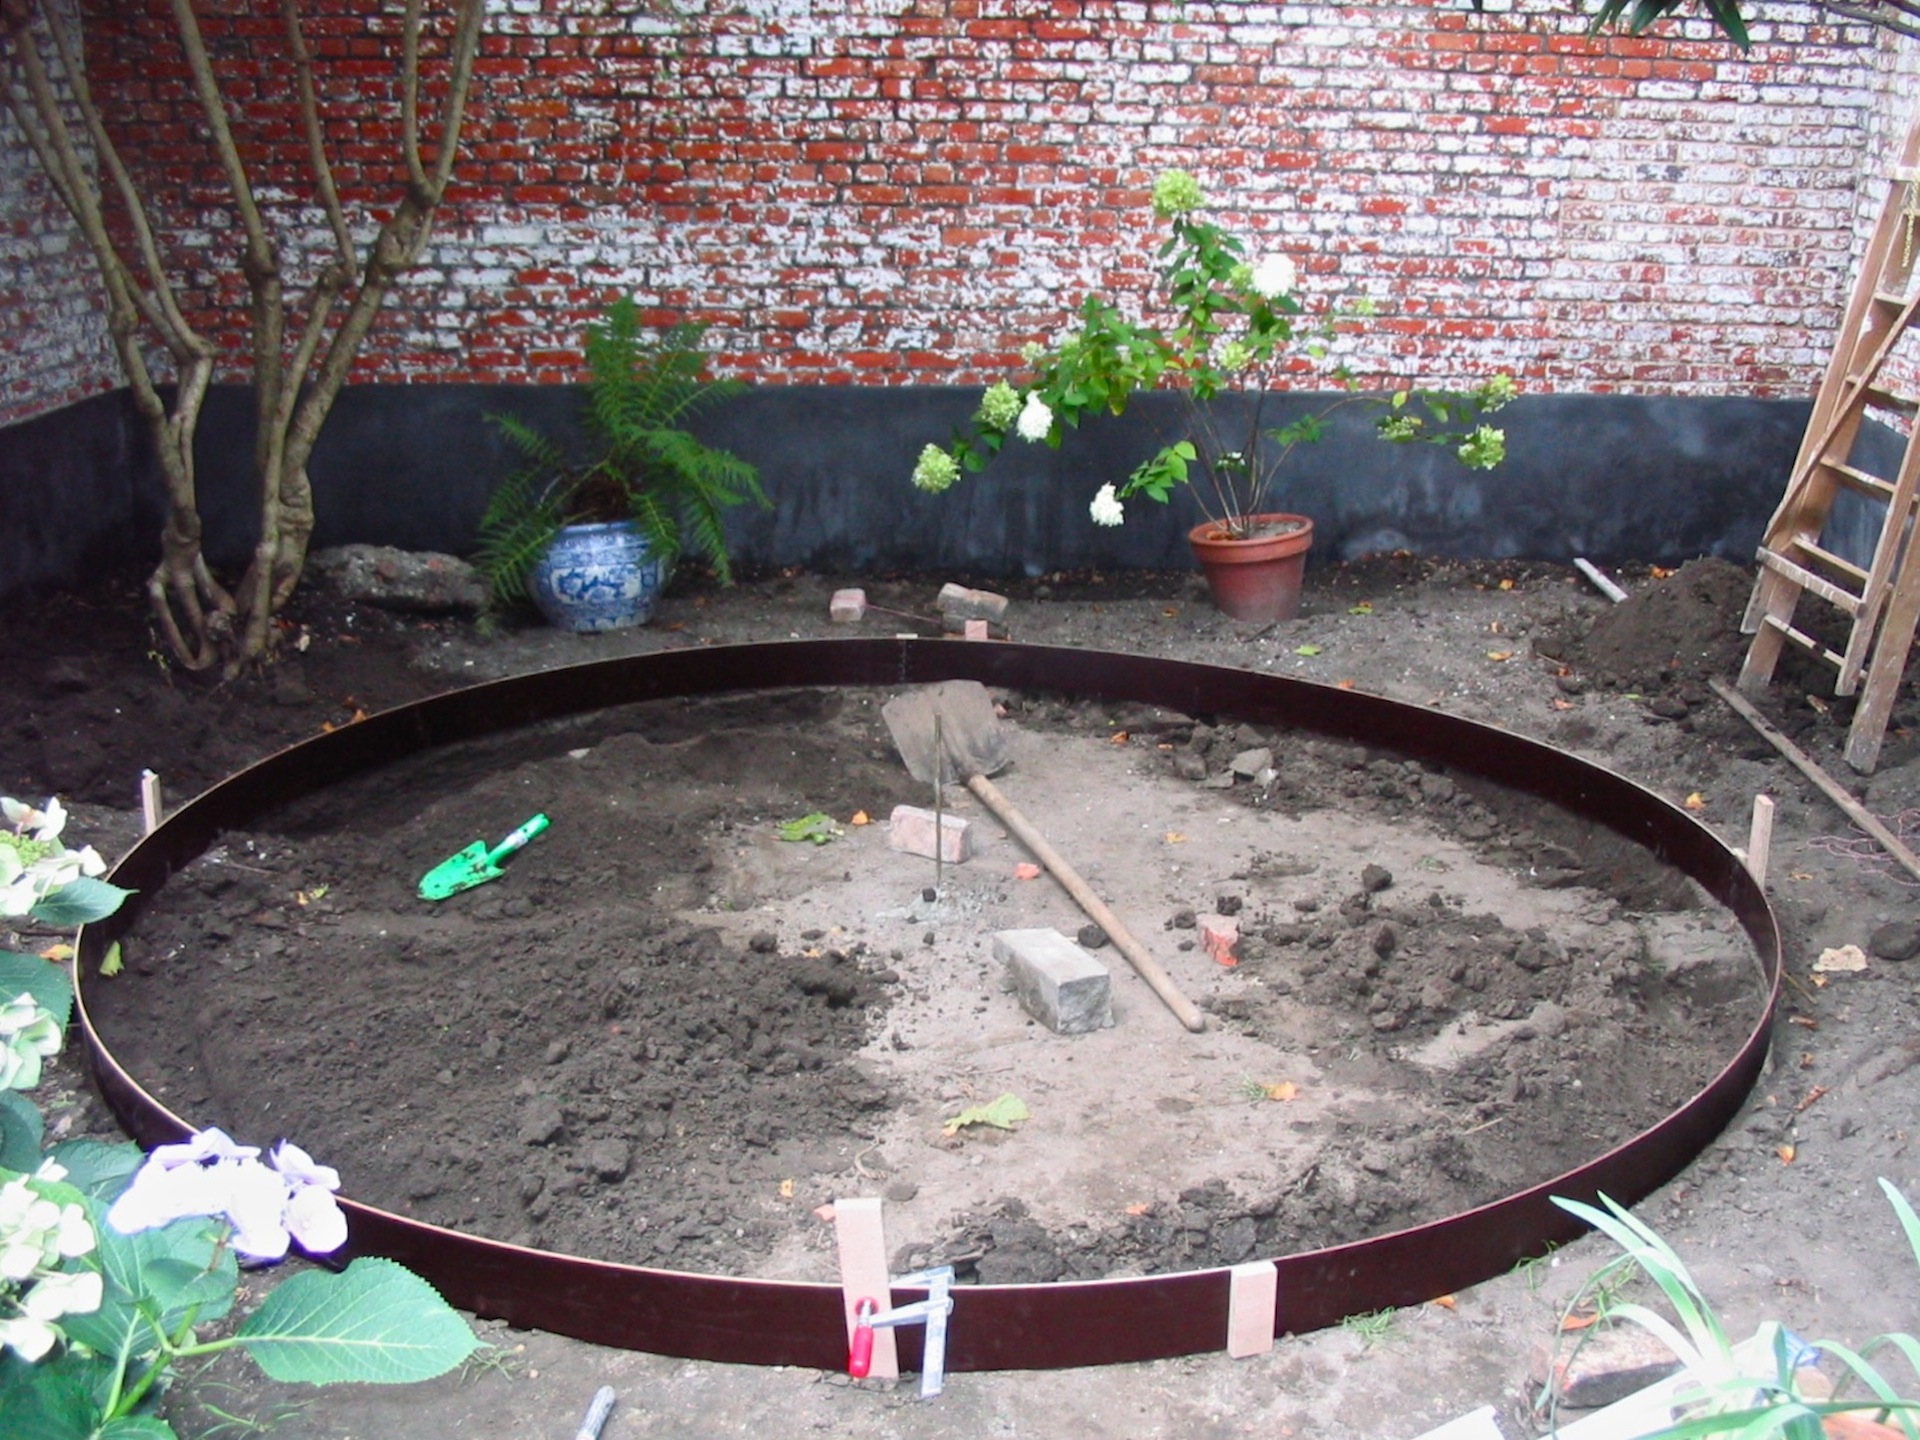
Next dig a trench and using wooden stakes and thin four inch wide bands of cement board make a form to pour the foundation. I had the lumber yard cut the bands for me.You could just dig a trench and let the earth form the groove like making a sand candle. It depends on how firm your ground is. make sure you are level by using a straight/rigid piece of lumber. This can be tedious and require another set of hands. You’re ready to pour your foundation. How to make concrete here.
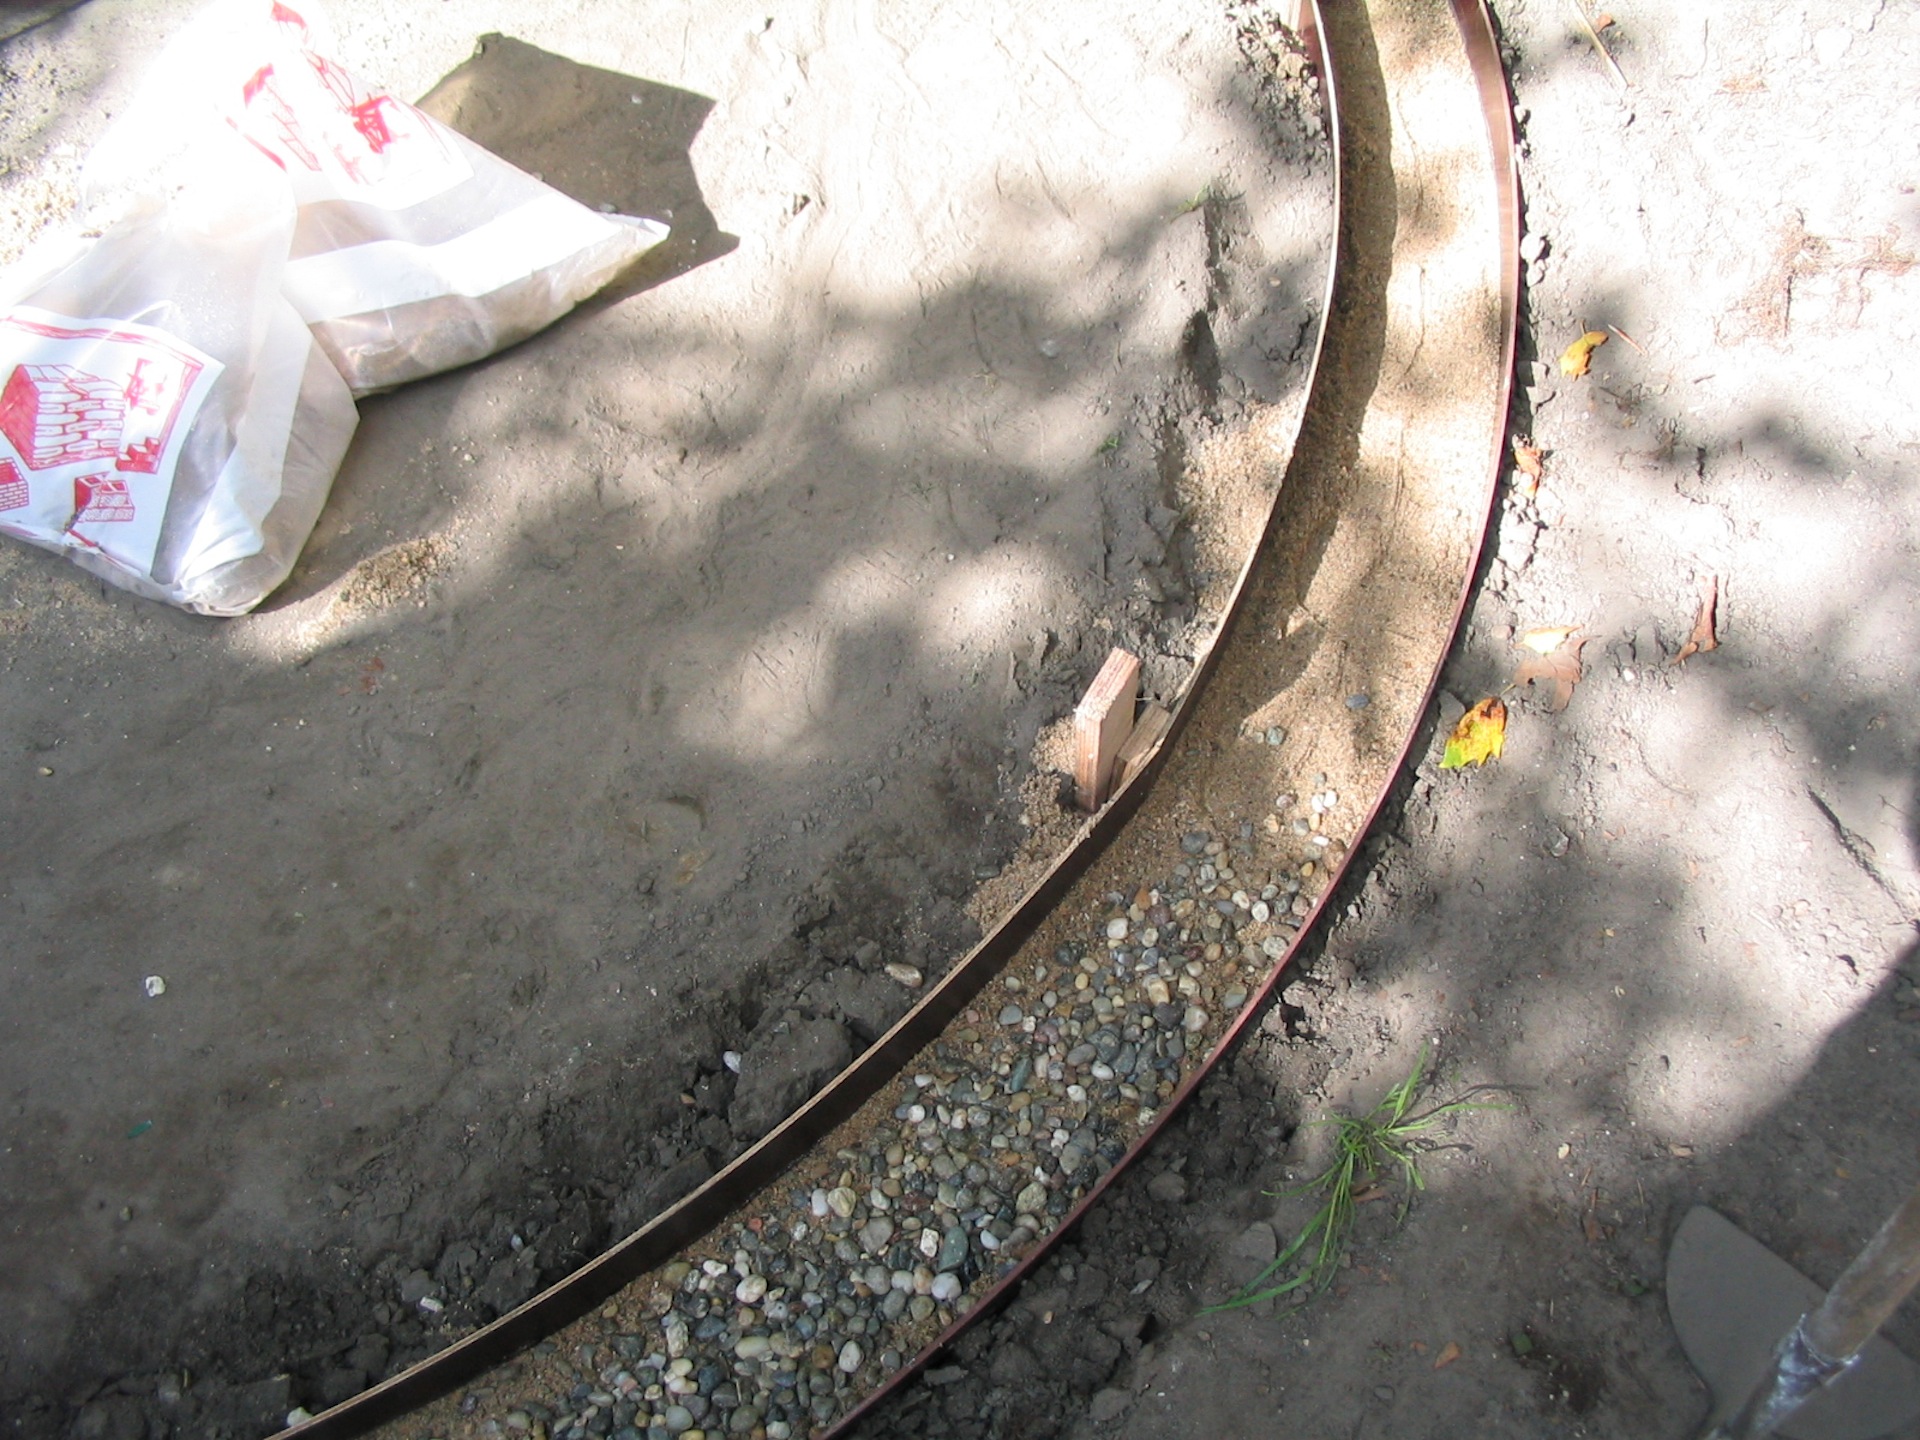 After the foundation has set for at least 24 hours remove the stakes and wood bands. Then using a stiff mortar mixture place your bricks on the foundation making sure each brick is on axe using the chain/string. Do so by troweling a bed for the bricks leaving the majority of the joint empty. I always wear latex gloves because they allow me to use my hands. You should soak your brick in water for at least a couple hours and wet the foundation with the hose before positioning them. This insures good adherence. If the foundation is too dry or the bricks are dry the moisture is sucked out of the mortar and it dries too quickly. In fact you should always keep your cement projects wet, misting them once the cement has set over the first 24 hours. Starting about after 4 or 5 hours depending on the temperature and humidity of the day.
After the bricks have set for 24 hours you can joint them. First give the brick a good dowsing with the hose. Let them sit until the water is absorbed. Then, Again using a very dry mortar similar to sand castle like consistency and a couple of skinny jointing trowels. You need at least two sizes because the joint is fatter at the exterior of the circle. pack the mortar in between the brick.
Ten tips for creating a garden circle
- Layout the furniture you plan to put in the circle to help establish the right circumference. If you are planning table and chars bear in mind the space you need for a chair to be pull out and sat in comfortably.
- Use a small chain instead of string to measure the circumference so it won’t stretch if it gets wet.
- Use some fast drying cement to plant you center stake so it doesn’t wiggle around.
- Tuck your circle against a wall or in a corner to create planting beds in the negative space around the outside.
- Make the finished level of the perimeter a little higher than your grass or surrounding material to allow for taller grass and to prevent water puddling on the top of the circle esthetically it looks better to be a little taller rather than lower.
- Use your center string or chain to keep each brick you lay on axe with the center of the circle
- Make a 4” foundation for your circle to make sure it doesn’t crack over time and can support foot traffic.
- Repurpose old pipe or steel rod to reinforce the foundation.
- Personalize your creation with old tiles, a mix of bricks, or even alternating groups of bricks on their side with groups of bricks laying flat.
- The center can be filled with gravel, grass, broken stone with gravel joints, wood decking, or even a pond!
- Wear latex gloves when laying brick or grouting to protect your hands and allow you to use your hands – the best tool of all.